Tuesday, March 9, 2010

Create Modify Views and columns In SharePoint Survey....

Had you ever tried creating a new view in sharepoint survey list ?


You won't find an option to do it by default but still you can do it  for a sharepoint survey.


Find the steps below >>   Create New View
  • Open the new view page of any list in your sharepoint site, and copy the URL to a notepad.
  • Open  survey settings page, and from the URL copy the List ID. (List=%7Bxxxxxxxx%2Dxxxx%2Dxxxx%2Dxxxx%2Dxxxxxxxxxxxx%7D).
  • Replace the list name to the last of the URL with the survey list name.
Copy the modified URL to a new browser window, and you are done, you will be now in the 'Create View' page of your Survey List. Create the view as you wish here..........


Find the steps below >> Create New Column.


  • Same the way you did for survey view, copy the new column page url (/_layouts/fldNew.aspx?ListID)
  • Replace the ListID with the survey list ID and you are done.
Find the steps below >> Modify View.


  • Inorder to perform the modify view of the newly created view as per the steps above, just add your list as a webpart to any sharepoint page.
  • In the modify shared webpart option, select the view which you want to edit in the Selected View and  select the option 'Edit the current view'.


Enjoy Customisation...........


Wednesday, December 23, 2009

Sharepoint Reports using Sharepoint Designer 2007

I was searching a lot for tools which can generate reports for me in sharepoint for many requirements like site usage, find the modified item in a document library, who all have modified a document in a document library, who had mad changes in the site..

The final answer on how to acheive all the same was simple.

Use Sharepoint Designer 2007

Yes, you can generate all the reports, create charts and even export them to excel from the sharepoint designer 2007. Open your site using sharepoint designer and at Site -> Reports,  you can find almost all the options you are looking for......

Find this how to Article with more details.

Friday, December 18, 2009

Restrict document library from uploading and opening in Explorer view

Are you trying to restrict sharepoint users from adding files to the sharepoint document library via, Upload document option and  using 'Drag and Drop' after opening in Explorer view.


You can acheive this by just adding some javascript codes to the page.


So heres how it can be done ...........

  • Open the document library where you want to restrict the upload and open in explorer view option.


  • Add a Content Editor Webpart to the page.


  • In the tool pane of the CEWP - Source Editor.- Add the below javacript codes.


  • Delete the explorer view of document library. 


   You are done with what you were looking for


Tuesday, December 8, 2009

Export to excel

IF you find export to excel not working in any version of sharepoint installed then try out this noce solution which helps you out.

Download- Run - Activate , you are done to use the feature.

Download it from : http://www.vana.in/Pages/ExportToExcel.aspx

Tuesday, November 3, 2009

Who deleted the site/list/library

Hi All,

I was asked by many queries how to find the person who deleted the site, list, library. list column etc... in a sharepoint site.

Today i found the solution.

Configure your IIS logs for all the sites on Hourly basis at IIS - website - Right click - properties- Website - Enable logging - properties ( assgin an easy path) -Advanced- Hourly.

TO find th eperson who deleted, find the edit page in the IIS logs and find the name added to it.......

site >> "/_layouts/deleteweb"
list >> "/_layouts/editpage"
list column >> "_layouts/FldEditEx.aspx" etc....

Thursday, October 15, 2009

Archive contents from Team Discussion

Steps : To archive the contents from the Team Discussion

1. Open 'Team Discussion'
2. Create a new view from 'Settings' - New View
3. In 'Columns'- Check the 'Body' field- OK
4. Open the newly created view and from 'Actions' select 'Export to spread sheet'.
5. Open the file in Excel and save it to your archive destination.

Note: The above steps will not save any attachments in the mails, For archiving the attachments.

1. On you computer - Open 'My Network Places'.
2. Under 'Network Tasks' click on Add a network place
3. Click 'Next'- Select Choose another service provider option - Next
4. Add the above url of the 'Team Discussion' as network address- Next
5. Give a new name - Next - Finish
6. A new web page will be opened with Folders for each mail.
7. Select the folders with the attachment and save them. ( The folders name will be same as the subject of the mail)

Wednesday, September 9, 2009

Update Global Navigation Link

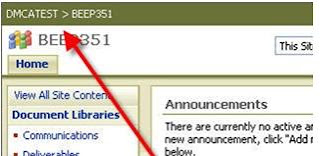
I was looking for a way to update the global navigation breadcum in a sharepoint site and doesn't found any valid solutions.
Today i got a chance to refer a white paper  published by microsoft which gives the steps which many may have noticed.


You can edit the portal site link at

Site Action site settings --> Under Site Administration -->Portal Site Connection.


Cheers!